Mitsubishi Colt Ralliart 400 Load Patch – AUDM JDM Rcolt Z27AG

400 Load Patch for Mitsubishi Colt Turbo – Why we need it
The engine measures boost via a Mitsubishi concept of Ecuload, with a value between 0 – 200. By default the Ecuload logging only goes up to 160, despite the ecu being able to see up to 200 ecuload. How much boost is this? The following table is a rough guide (credit Merlin, Evo X tuning guide):
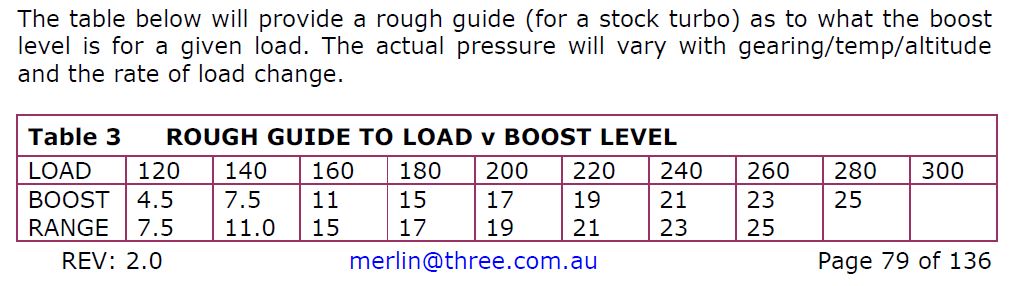
Boost vs EcuLoad
So the Rcolt Ecu can only see up to 200 load (about 17-18 psi depending on mods). This means any map in the rcolt ecu that goes past 200 load will not be used by the ecu, instead it will use the 200 load column (fuel, ignition, mivec etc). As ecuload is also a measure of the amount of air the engine is receiving, it also means as you go over the 200 load figure to say 220 load, the ecu is seeing and fuelling only to 200 load worth of air. This will cause the ecu to run leaner than the targeted AFR ration in the fuel maps, potentially catastrophically leaner depending on your boost level and richness of target AFR.
Another negative of the 200 ecuload limit is that the boost control system starts to not function properly as you approach and exceed 200 load. You might dangerously overboosting at 250 ecuload, but as the ecu only sees 200 load, it does not react to the overboost condition, potentially causing problems.
Fueling
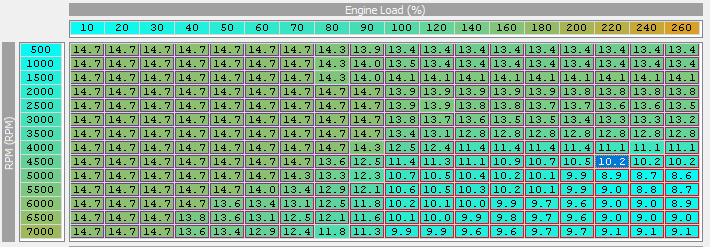
With 400 load patch applied, the ECU will be more able to hit the target AFR ratio. A highly tuned Rcolt’s fuel map without 400 load patch might have a number of seemingly very rich AFR ratios in its fuel map like the example below:
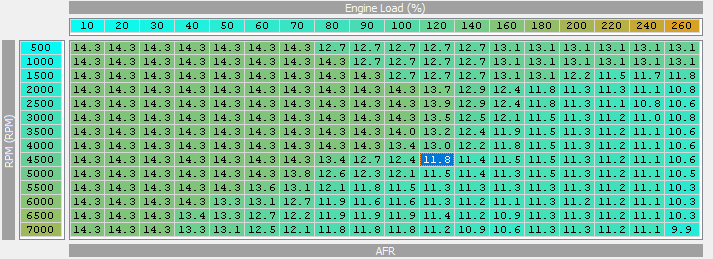
With 400 load patch this over fueling compensation is not needed, and you can target closer to what you actually want to hit. Example below:
Boost Control
With 400 load patch applied we can turn back on the factory ECU’s reactive boost. This is both a safety mechanism to stop over boost, but also a way to achieve faster spool when the ecu is not hitting the target boost you are wanting.
Turning on Reactive boost with 3 port boost solenoid
The following shows the configuration to set up reactive boost on a 3 port boost solenoid system:
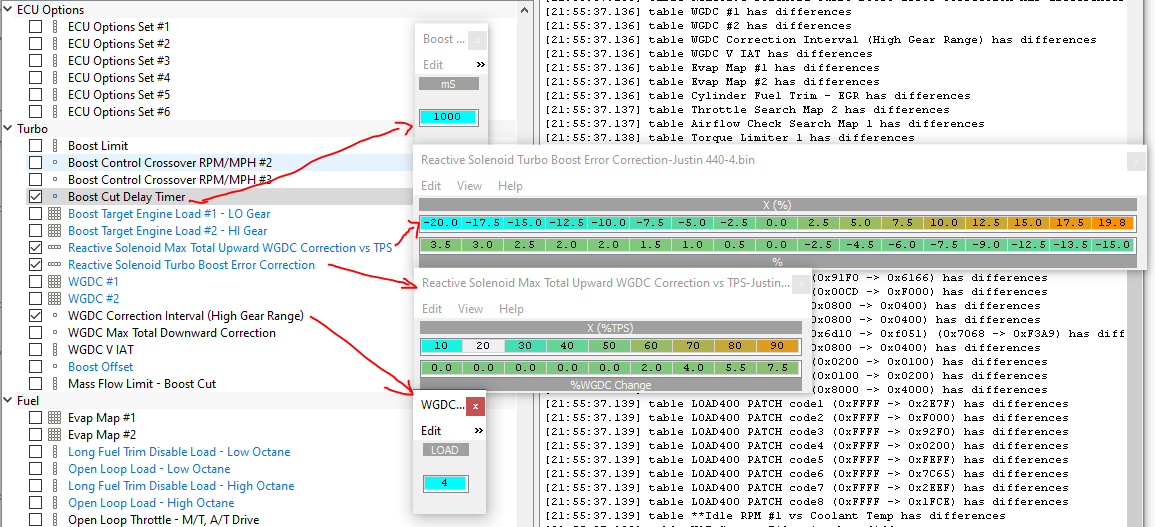
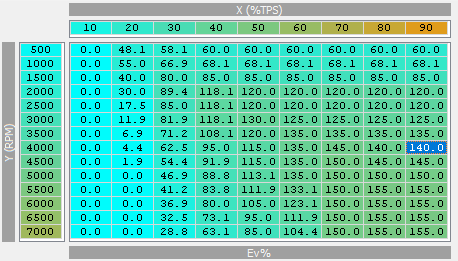
WGDC and Boost Target Engine Load
The two WGDC tables define the wastegate duty cycle values for 1st and 2nd gear, and then 3rd thru to 5th gear. With reactive boost, these tables set the initial wastegate duty cycle (WGDC). The ecu then compares the current ecuload figure against the equivalent Boost Target Engine Load table value (again 2 maps for the gears) plus the ‘Boost Offset’ value.
For example. We are in 2nd gear, at 4,000 rpms and full throttle. The WGDC map 1 (for 1st and 2nd gear) sets WGDC to 43.5%:
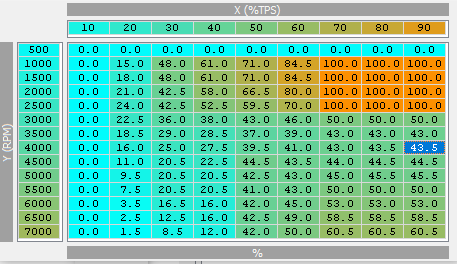
Lets say the car hits 160 ecuload. The ecu then gets the corresponding value from Boost Target Engine Load #1:
In this case, 140. It then adds this to the Boost offset value, to arrive at the final target load we are wanting to hit. With a boost offset of 75, it means the ecu wants to hit 140 + 75 = 215 ecuload, much more than our current 160 ecuload. The ecu will then modify the WGDC being used based on the reactive boost tables mentioned earlier (Reactive Solenoid Max Total upward WGDC correction tables etc). So WGDC is increased, and the car’s boost & ecu load starts to raise. It continues to try and hit the target, adding (or subtracting) constantly during operation. With this example we would see the car start to spool up faster than it would have otherwise.
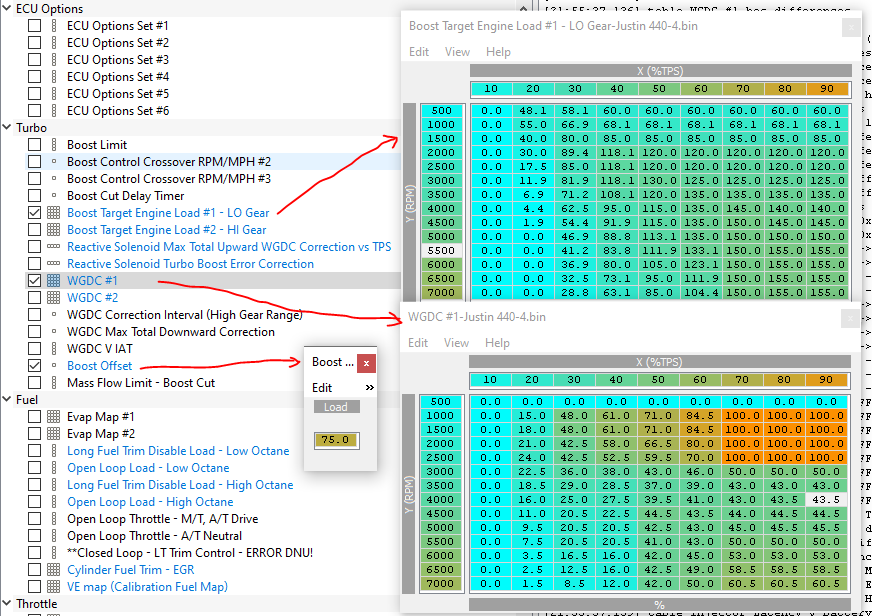
The other benefit is over boost protection. Lets say we are hitting 250 load, but the target ecu load + boost offset = 215. WGDC would be reduced to try and rein in boost until it hit the target, providing a safety need. This safety net is particularly useful on the track, or on the dyno when a slower ramp up rate is being used.
Logging
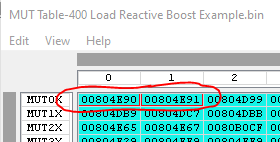
To load an ecu with the 400 load patch you need to apply the MUT 2 Byte Ecuload patch. This is done by changing the first two values in the MUT table to :
Then use your regular logging method (Tactrix or Evoscan, see turbocolt.com on how to set this up), with MUT 2 Byte Load logging enabled.
Other Random Notes
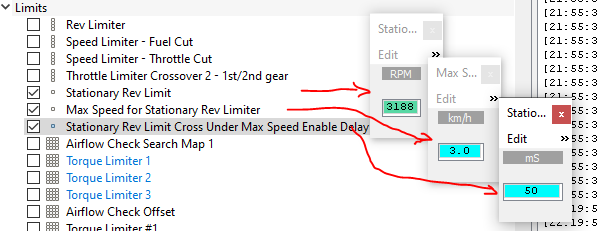
Launch Control
Example:
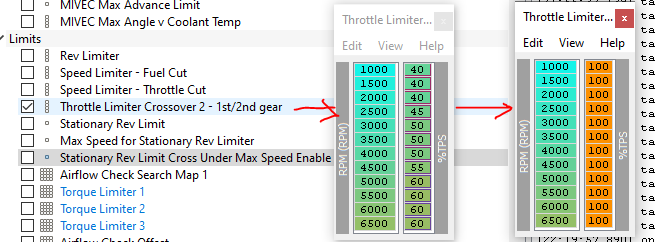
1st & 2nd Gear Throttle Limiter
Stock ecu limits throttle in 1st and 2nd gear, making 1st gear easier to launch, but inhibiting 2nd gear acceleration. This can be turned off by changing the table from stock settings to 100%:
Disabling Cat Warmup
The negative timing, and the leaner fuel serve to help the cat reach operating temperature faster. Set to 0, and 14.7 to achieve a smoother cold driving experience.

Disabling Immobiliser
Setting bit.03 to 0x0 disables the immobilizer check before starting:
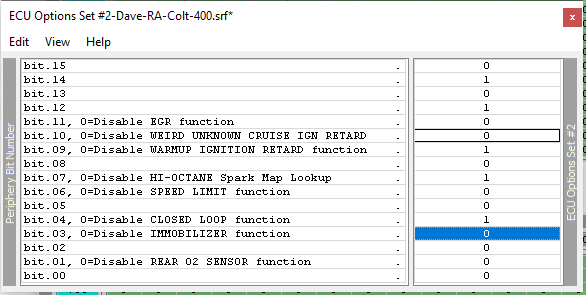
Disabling 2nd O2 Sensor
As above but set bit.01 to 0x0
Pops and Bangs
See turbocolt.com on how to set this up. People want it, but its all a bit silly (and not as effective as modern pops and bangs or burble tunes).
Logging
See turbocolt.com for guide on Evoscan or Tactrix Logging. Also check out the bit about 200 load logging, to ensure you are capturing the newly patched 400 ecuload limit
Example Changes to Non 400 load tuned ROM:
Fuel Maps:
No longer need to target super rich AFR’s to try and compensate for ECU getting fueling wrong. Assuming injectors & MAF is dialed in nicely can set the fuel map to hit what you actually want to hit:
High Octane Fuel Map, before, unpatched:
After, patched:
Spark Maps:
Build up the ignition more progressively. Log knocksum and adjust ignition maps appropriately.
Tuned Hi Octane Spark Map 1, Mivec Max – map before:
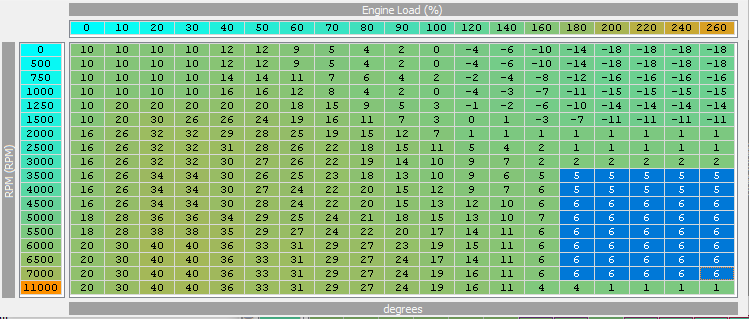
Tuned map, after (note if tracking probably want to take more timing out):

Note – that is just an example, often timing ends up lower than this. To find the right timing, a combination of knocksum & traditional dyno tuning techniques should be combined. On boost, any regular repeatable knocksum value should be reduced to zero by decreasing timing until it does not occur anymore.
The above map will be used when MIVEC advance hits its maximum value. The other hi octane maps are for MIVEC at minimum, or at target and should be adjusted similarly.
Comparing Changes in the Base to what you had before
Load up both srf files in Ecuflash, go file->compare Roms. This will highlight all maps with a change.
Summary of changes made – 400 load, timing map changes (log knocksum to see if safe), stationary launch enabled, cat warmup stuff removed (smoother cold driving), dual boost maps back on (wgdc 1 and 2), reactive boost back on (faster spool, overboost protection), more mivec (trial it maybe you like the old map), modified wastegate/boost maps for faster spool (will need tweaking, could be too much or too little – change both WGDC maps AND boost target load maps), Mut 2 byte load mod (enables proper ecuload logging).

Leave a comment